Online Demo Short Tour
Navigating the online demo

Technical Support
Last Update 2 years ago
It’s time to start exploring our software.
This is a short guide that will allow you to discover how Epoptia MES can help you grow your business.
Create your account, by clicking here.
It is Free for 15 days.
Production Screens
Click the production button on the left menu.
This is one of the main screens with example Workorders.
The software manages Workorders & Workorderlines (or for short WO & WOL), which for you could be sales orders, production orders, manufacturing orders, etc. corresponding to your lines.
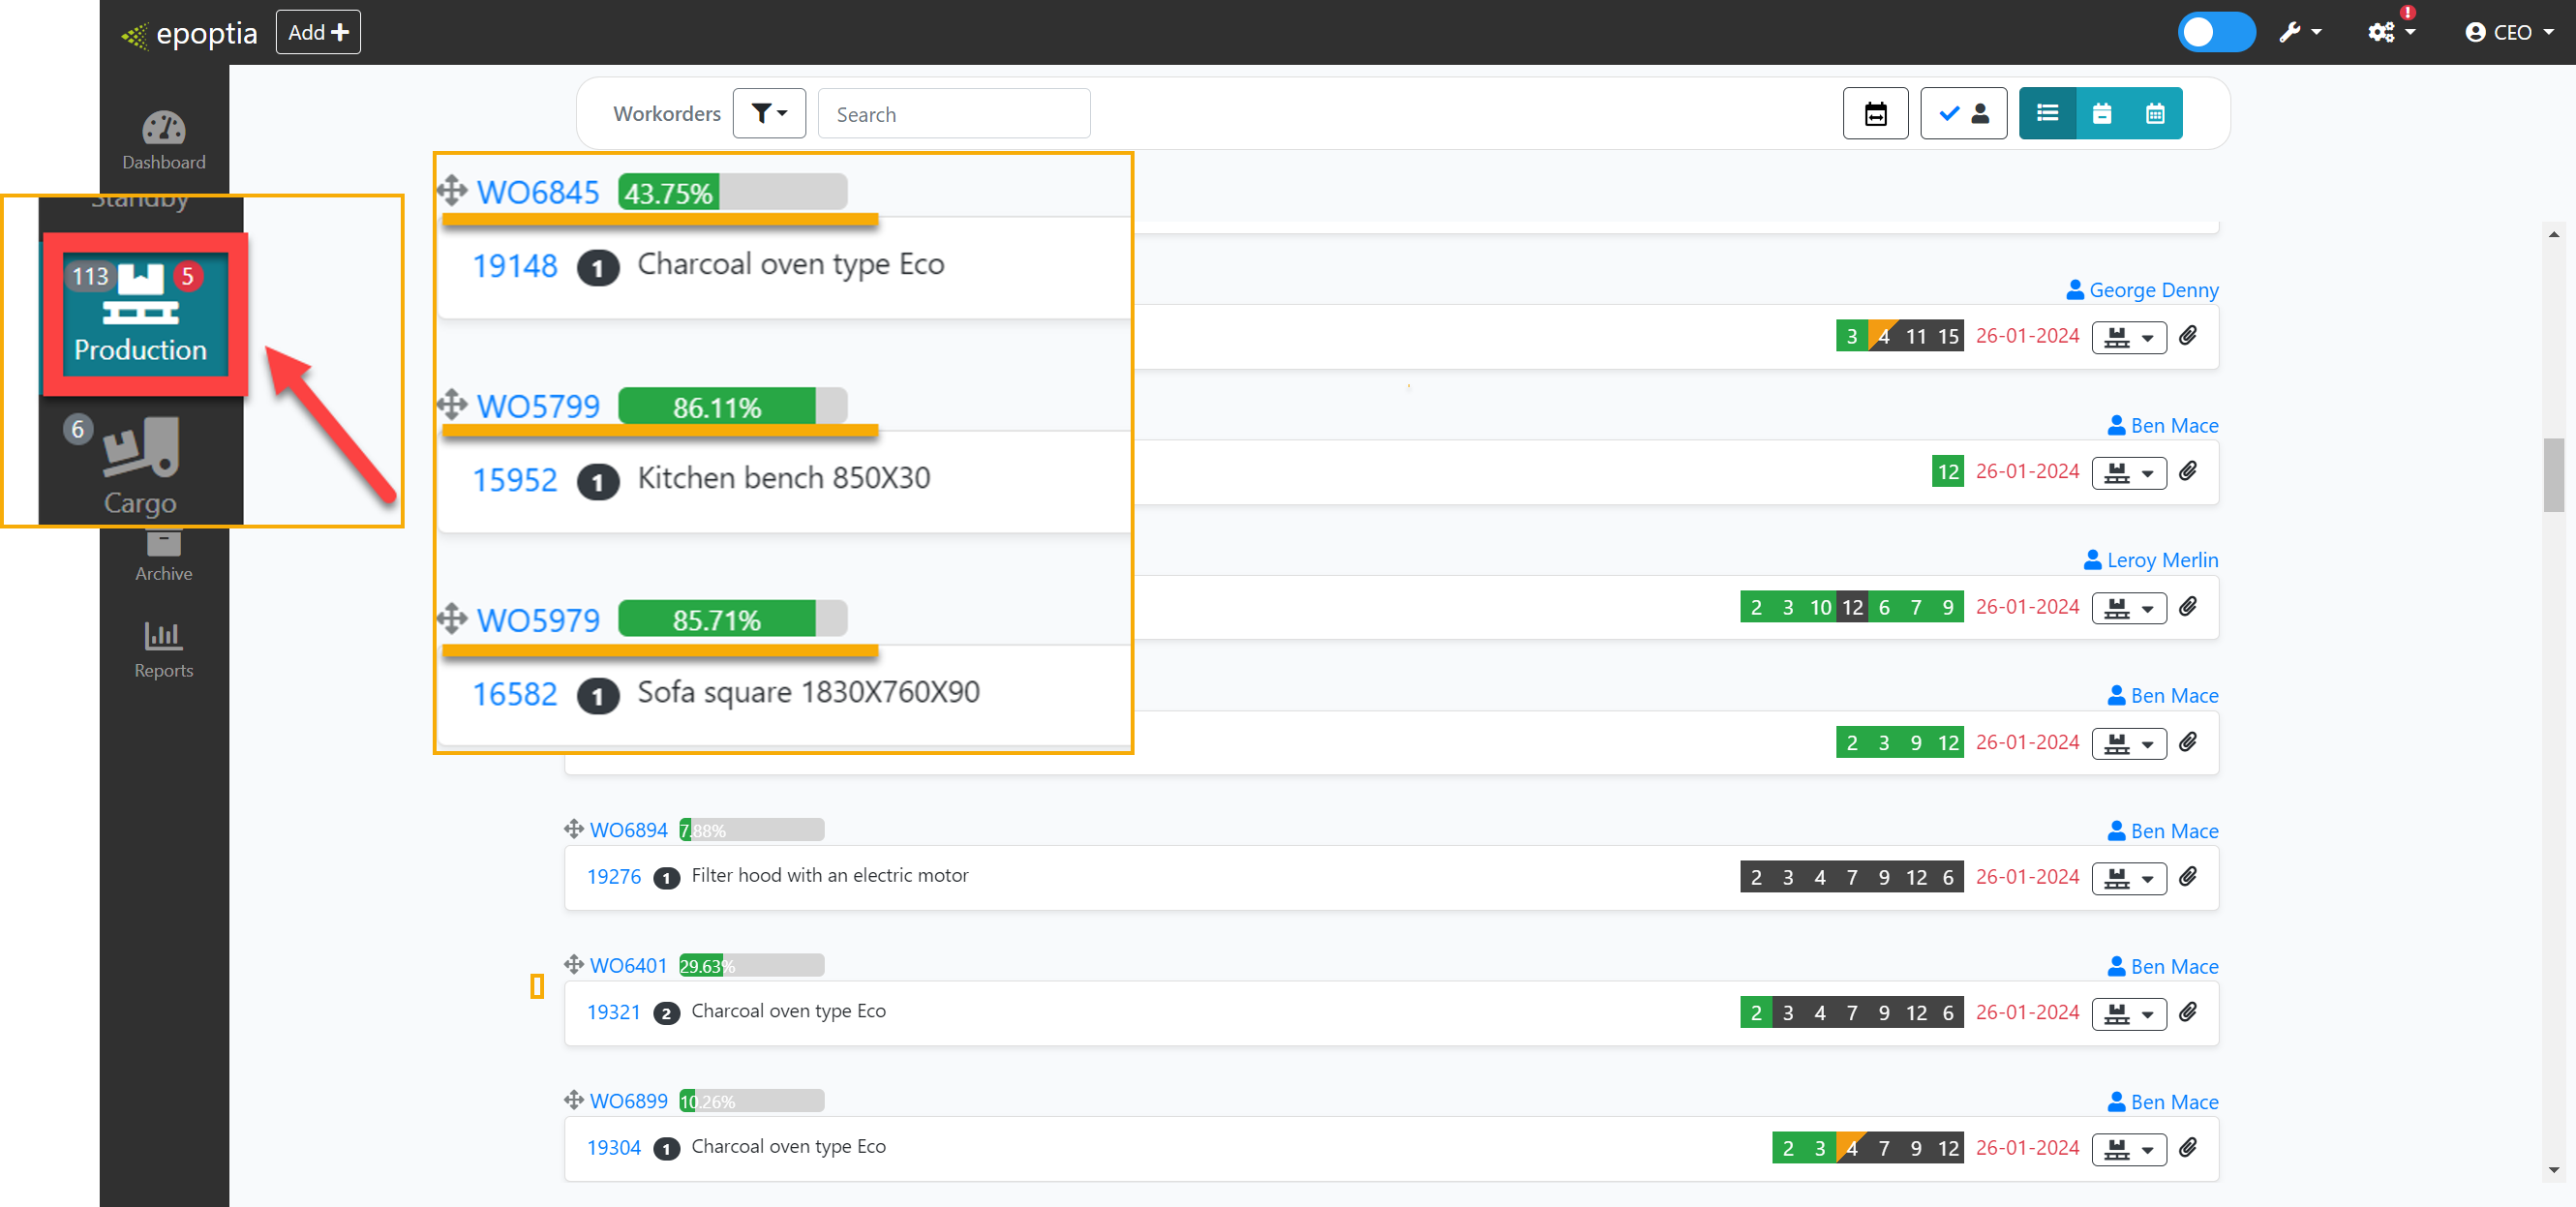
It also replaces the paper worksheets, or Excel sheets you might have been using up until this point
A Closer Look at Workorders


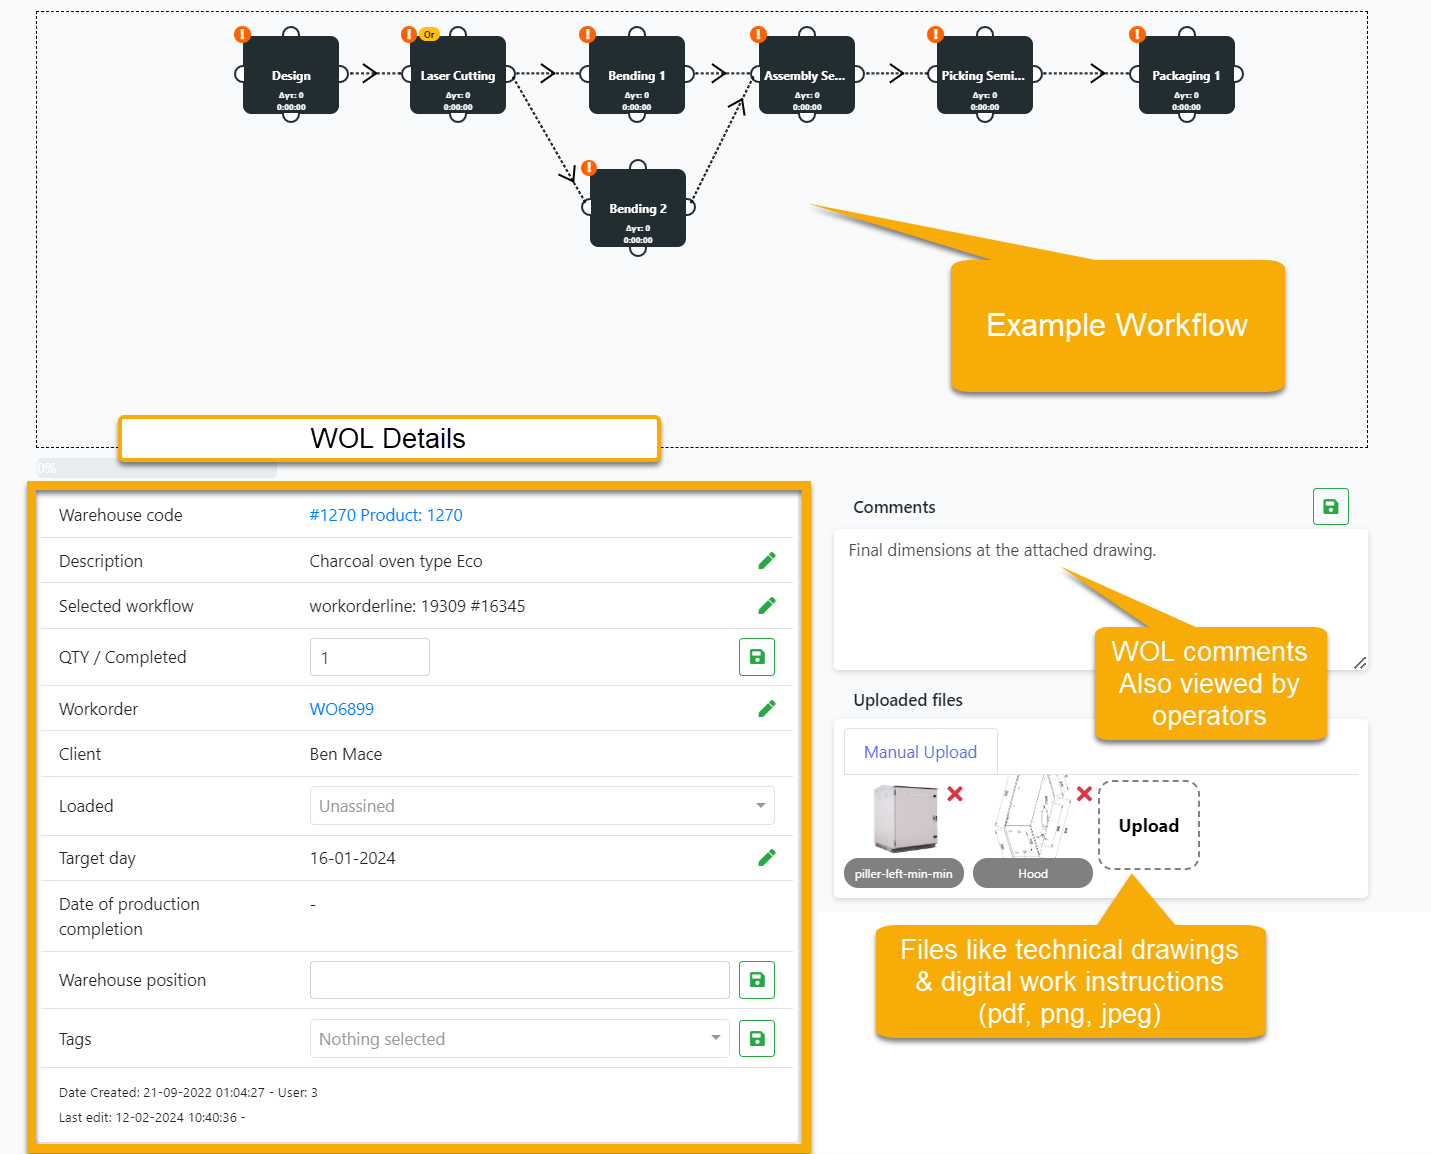
Click on the Workorder line (or WOL) number where we have all the necessary information for production execution, including:
- Workflows (more commonly known as routings) are the visual representation of the different workstations that your manufacturing process consists of. Here is where we apply the logic of the manufacturing processes to our software. You can create workflows easily by using drag & drop.
- Comments, that are displayed inside production for the specific WOL.
- Files like technical drawings, that are displayed inside production for the specific WOL.
- Details such as Client, Quantity, Description, and so on.
Test like an Operator
Now, let's see what operators interact with.
We need to set up Production Terminals.
Terminals are assigned to workstations. Could be tablets, smartphones, or existing PCs (Via browser), that are placed inside your production.
For the purpose of this demo guide, to set up a terminal please follow the link below, either in a different browser or an incognito tab.
Click on Operator Screen & confirm teminal set.
Then, go to Settings (top right) -> Workstations -> Terminal tab.
There you can accept registration requests that appear from terminals and assign them to workstations.
You have successfully set up a terminal.
Select an operator and you will be able to see all the available tasks, for this specific workstation.
Start a specific WOL number and go to the production screen.
Search the specific number and check the progress of the WOL through the routing.
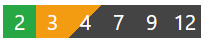
The numbers in the following image, represent the different workstations.
- Completed, is the workstation with the number 2
- In Progress, is the workstation with the number 3
- In Paused, is the workstation with the number 4
- Not Started, are the rest of the workstations.
In the following video, you can see what the administrators see, when a WOL is started, paused, and completed
Getting to know the Interface
Let’s start by navigating the different types of menus on your screen.
On your far left you will see the following menu:

- The Dashboard helps you review your production through 3 key features. First, you can see at a glance all your key performance indicators & your active terminals as well as all the operators working the current shift. Next, we have the Workstation Overview, which is especially useful for production managers because it shows, workload queues per workstation. Lastly, through Real-Time Workstation Monitoring you can identify which terminals are active and working.
- Standby displays all the workorders that are in a "Standby" status . This means that the workorder is not displayed inside production.
- Production is where you can manage, search and prioritize your Workorders.
- Cargo Management is a very useful system for manufacturers that schedule truck loadings.
- Archive is the place where every workorder, that has been completed remains stored for historical purposes. (Every single action is recorded)
- Reports provide business intelligence with a complete reporting suite. With a variety of KPIs and charts like OEE & Efficiency. (Operator's reporting is included)
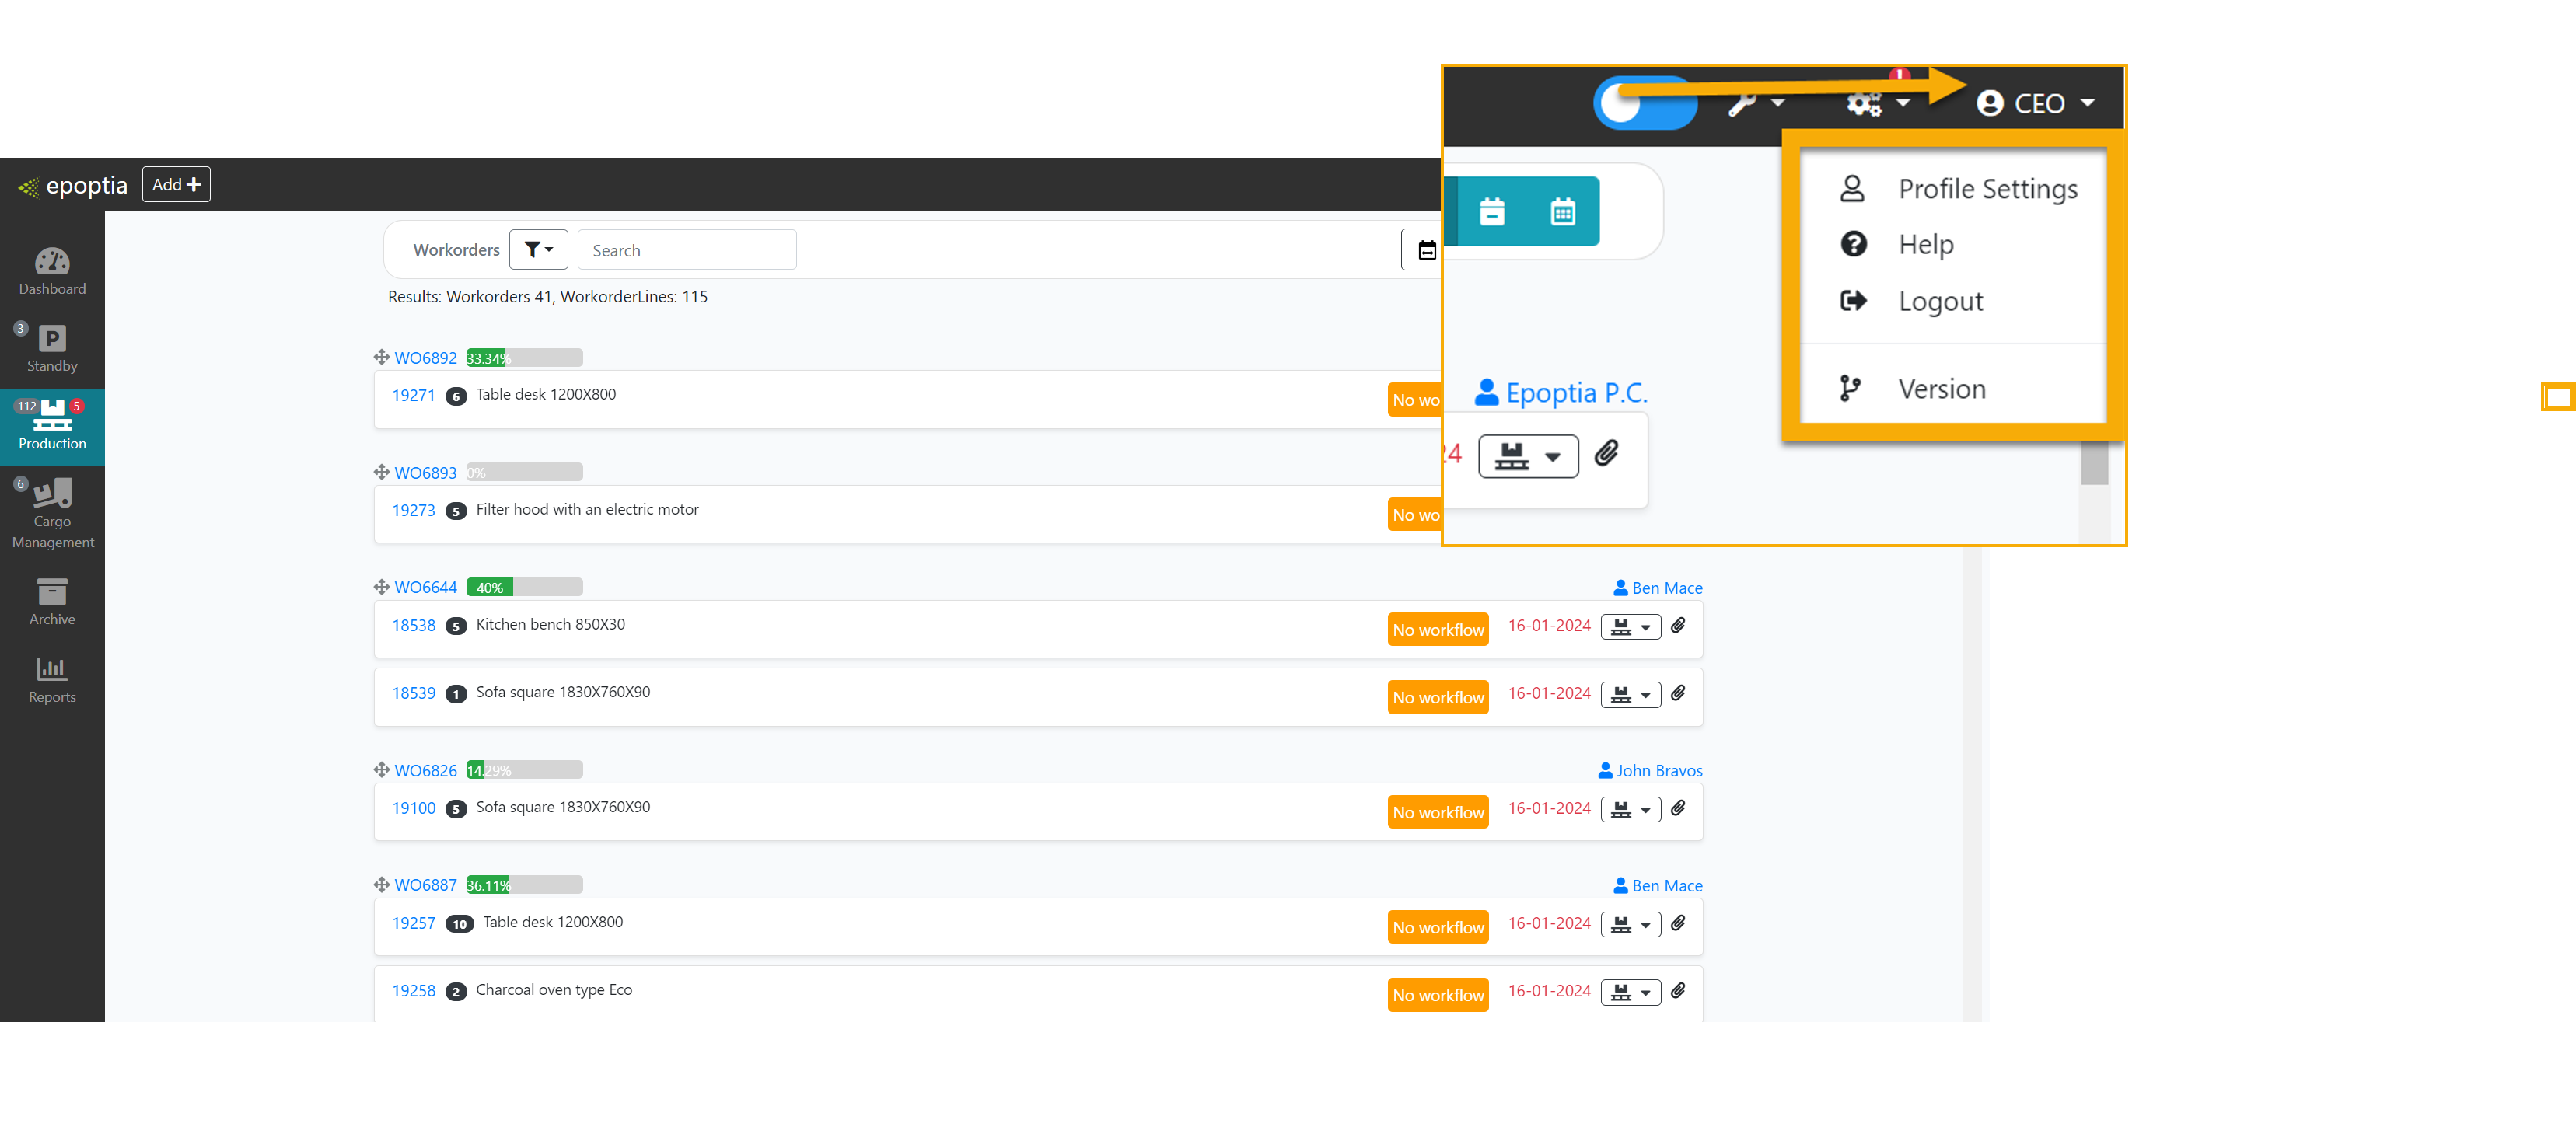
On the top right corner of your screen you can locate the Settings menu and the Profile Settings.
In your Settings you can see all the different things you can customize and configure in order to make your production more efficient.
On the top right of your screen, the Profile Settings are centered around your experience as a user.
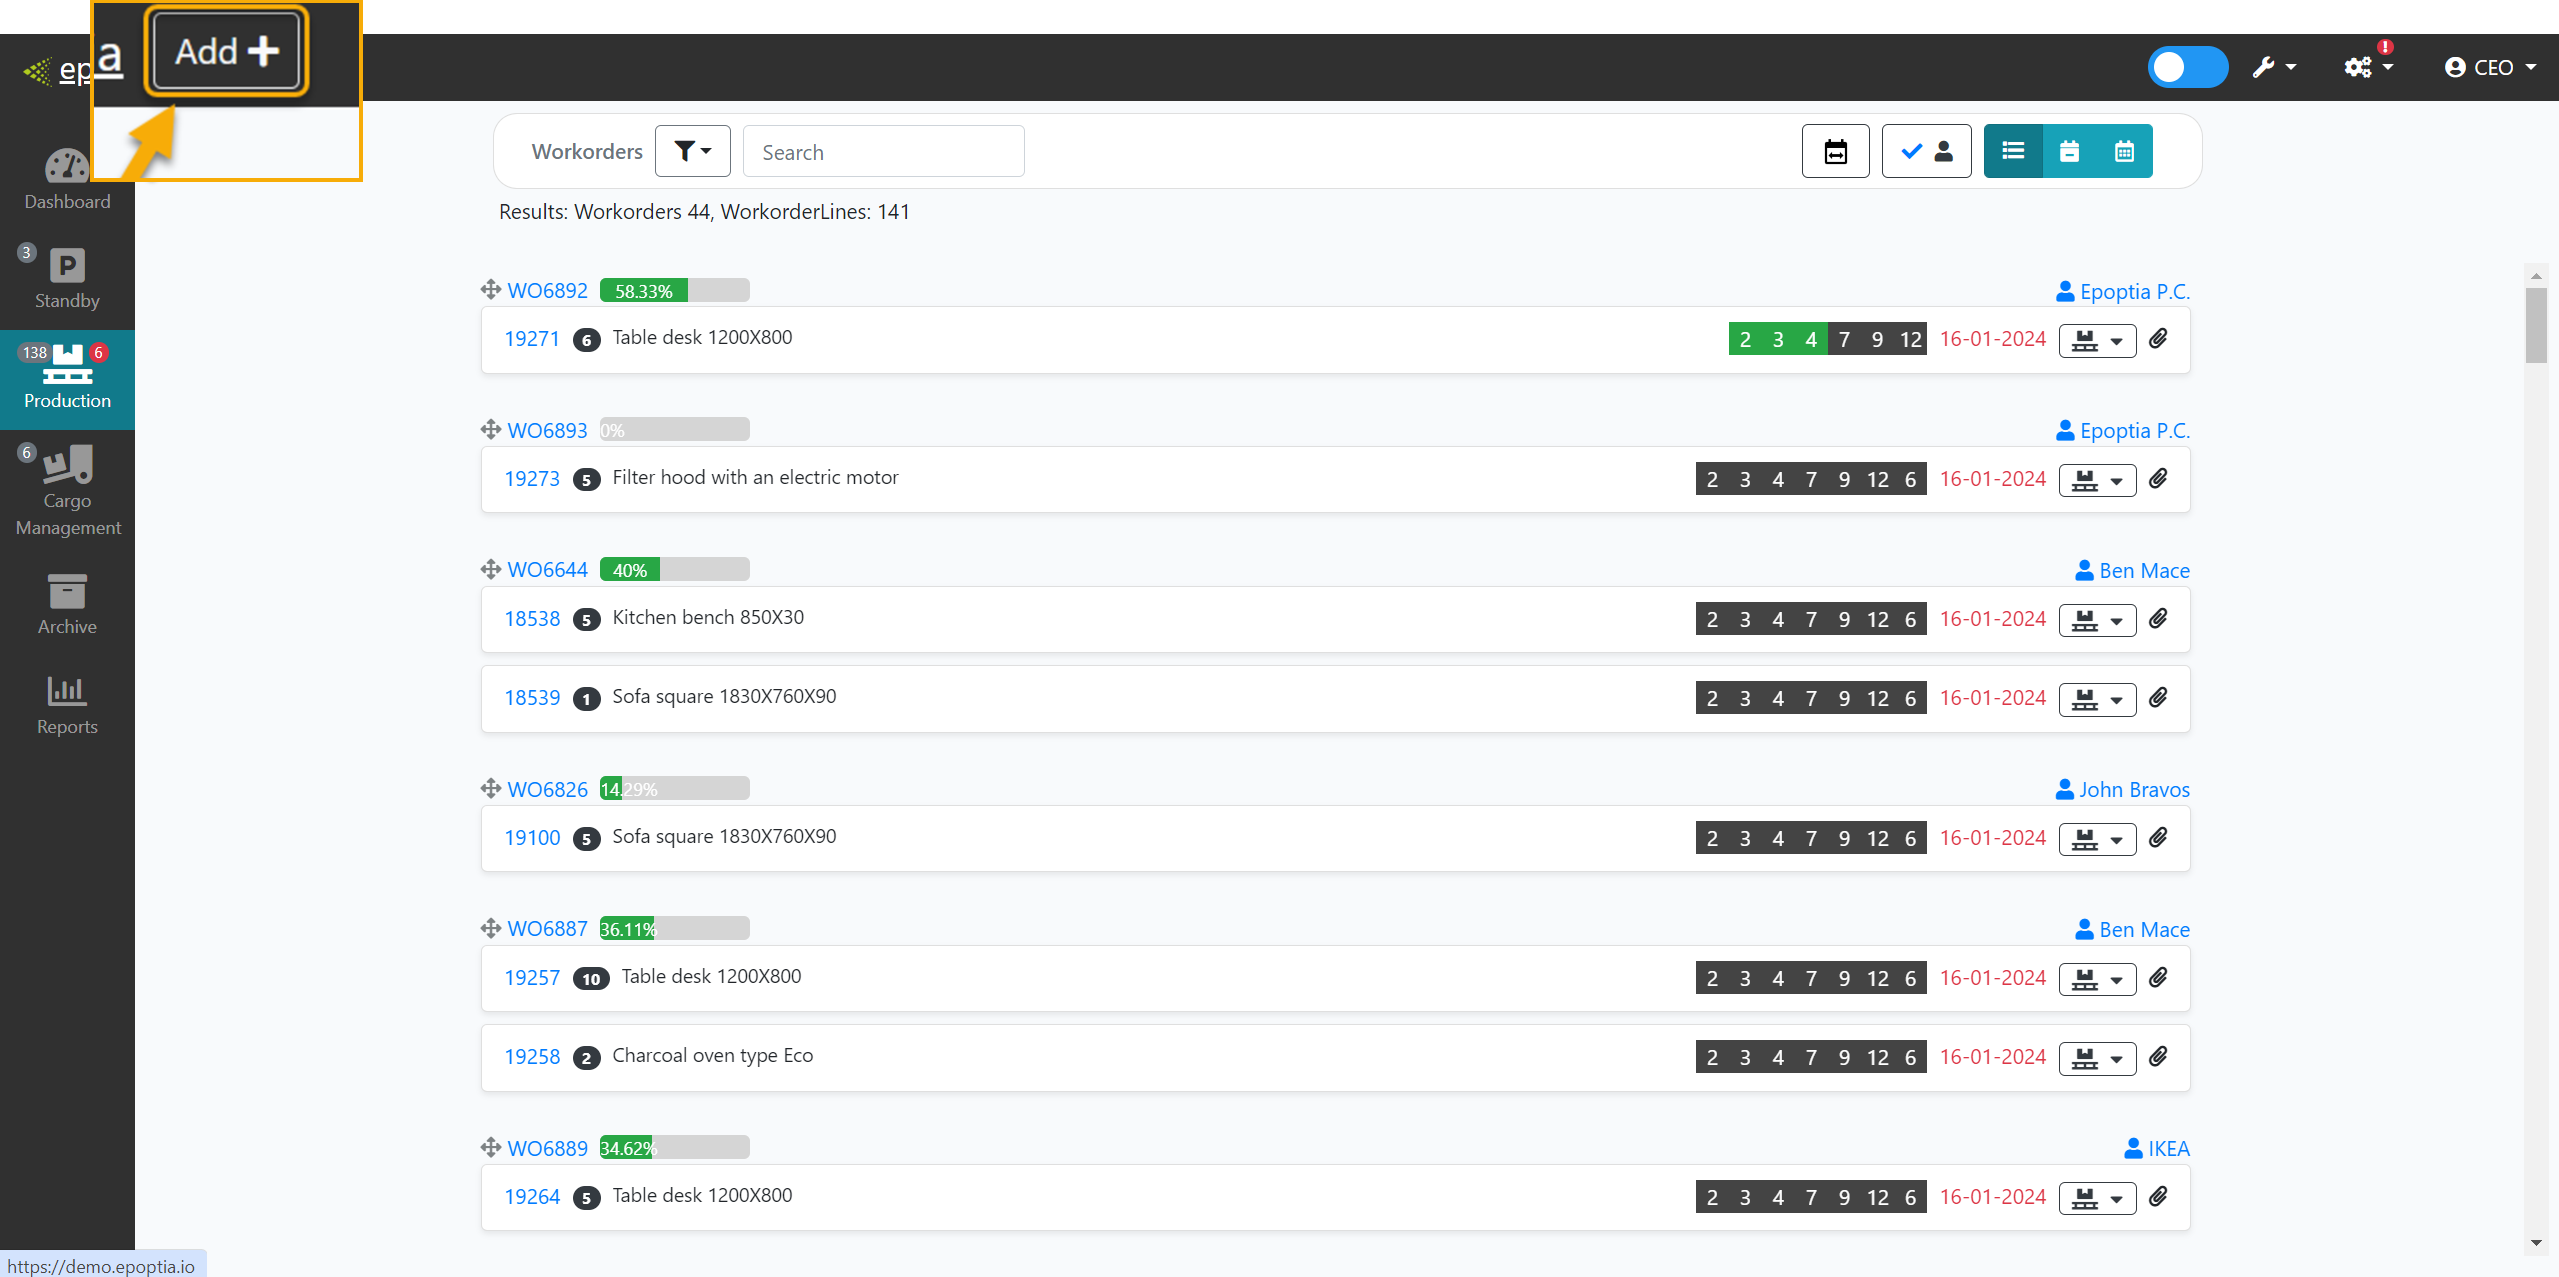
You can spot the Add+ menu where you can add work orders.
If you enjoyed our demo, start your 15day Free Trial.